Tutorial
In this tutorial, we’ll make a simple game that can be included as a prefab inside any VRChat world.
Prerequisites
Section titled “Prerequisites”This tutorial assumes you have VCC (VRChat Creator Companion) and Unity setup already, and basic familiarity with both. If you don’t, do VRChat’s own Creating Your First World tutorial first.
Step 1. Setup
Section titled “Step 1. Setup”- Download the template project as a ZIP from GitHub and extract it somewhere on your computer.
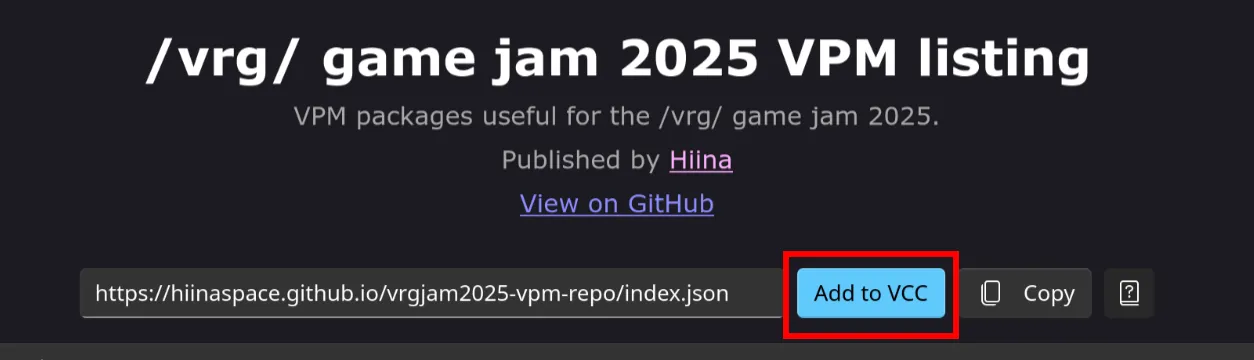
- Open your web browser and go to https://hiinaspace.github.io/vrgjam2025-vpm-repo/
- Click the “Add to VCC” button at the top, which should open VCC (VRChat Creator Companion):
 This ensures you can get both packages and see when they update.
 - Add the extracted template folder as a project.
- Click the ‘Manage Project’ Button on the new project. If you see a prompt to “resolve dependencies”, accept it (this’ll download everything for you).
- Observe that the
Mugi (Mini Udon Game Interface)and/vrg/ Game Jam 2025 Submission Helperare in the list underManage Packages. (You might get a prompt to download these if they’re not there.) - Open the project in Unity using the button in VCC.
- Wait warmly while Unity loads everything.
Investigate the project structure
Section titled “Investigate the project structure”While it’s loading, check out the project structure in your file browser. The important parts look like (along with some .meta files):
DirectoryAssets
- …
DirectoryPackages
Directorycom.example.jamgame
- manifest.json
DirectoryRuntime
- com.example.jamgame.asmdef
- UdonSharpAssemblyDefinition.asset
DirectorySamples
- GameTestWorld.unity
- …
- …
Unlike a full VRChat world, we’re going to do almost all of our work in the Packages/com.example.jamgame folder rather Assets/. This is because when somebody includes your game in their world, they’ll also see your package as separate from the rest of the their assets.
Step 2: Rename Your Package
Section titled “Step 2: Rename Your Package”- In Unity’s browser, navigate to
Packages/!/vrg/ Template Package'. - Right click the folder and “Show in Explorer”
- In Explorer, notice that the folder is called
com.example.jamgameinstead. - Right-click the folder and rename it to
com.example.awesomegameso don’t conflict with other packages using the same template. - Open the
package.jsonfile inside this folder. - Update the package metadata
nameanddisplayNamefields (leaving the rest of the fields as they are):package.json {"name": "com.example.awesomegame","displayName": "Awesome VR Game",...} - Back in Unity’s Project browser, notice that your package now shows up as
Packages/Awesome VR Game. ThedisplayNamefield from the metadata is what unity displays, while Explorer shows the folder name:com.example.awesomegame.
Step 3: Rename the Assembly Definition
Section titled “Step 3: Rename the Assembly Definition”- In the Runtime folder of your package, notice the
com.example.jamgameAssembly Definition file: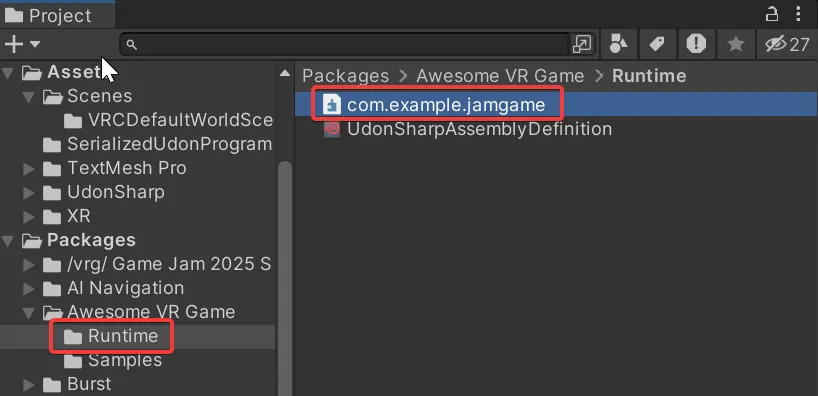 (in the file browser, its extension is
 .asmdef). - Rename the file to
com.example.awesomegameto match the overall package. - In the inspector for the file, also rename it to
com.example.awesomegame.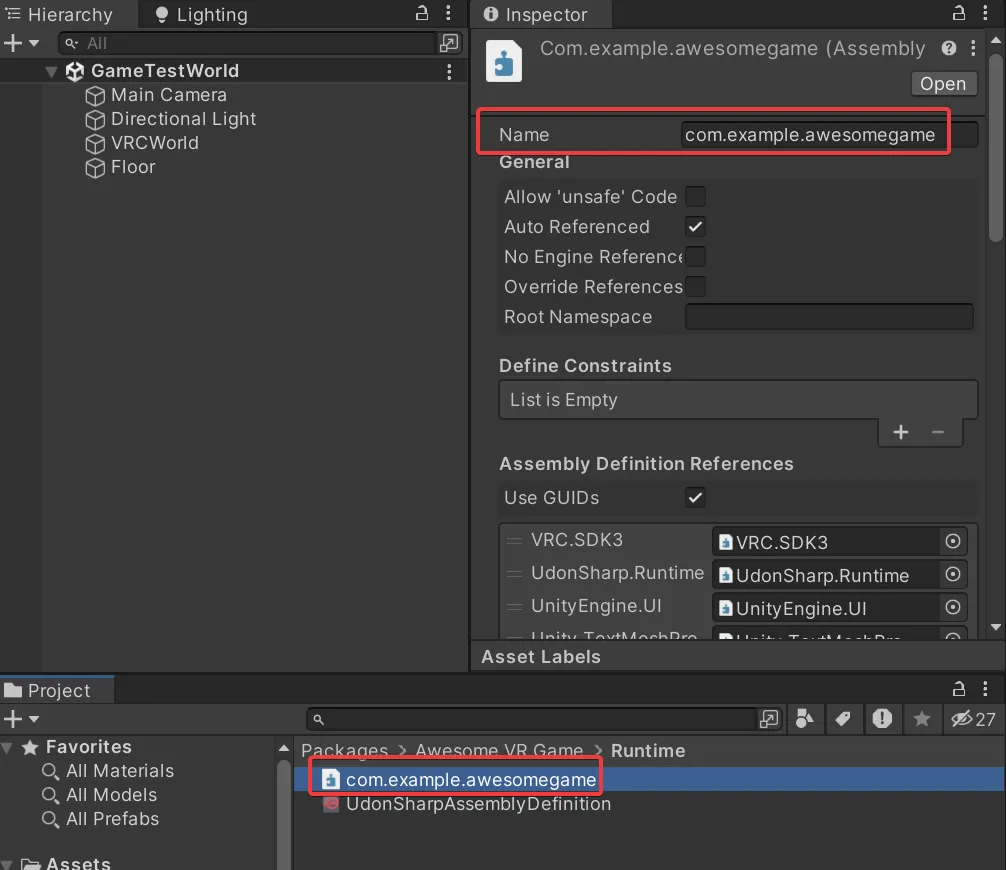
Step 4: Create a new MugiGame-based Prefab
Section titled “Step 4: Create a new MugiGame-based Prefab”- In the Project window, navigate to
Packages/Awesome VR Game/Runtime - Right Click in the window and click
Create -> Mugi -> Mugi Game Variant. - Save the new prefab as
MyAwesomeGame.prefab. - Double-click
MyAwesomeGame.prefabto open it in prefab editing mode - This prefab contains the MugiGame framework components at the root.
Step 5: Add a Capsule
Section titled “Step 5: Add a Capsule”- In the prefab hierarchy, right-click and create
3D Object > Capsule - Name it “ScoreButton”
- Position it at the center of the scene (0, 0, 0)
Step 6: Create the CapsuleClicker Script
Section titled “Step 6: Create the CapsuleClicker Script”Now we’ll add some behavior.
-
In the Project window, navigate to
Assets/(not the Package) -
Right-click and create
Create > U# Script -
Name it
CapsuleClicker. -
In the Project window, see that it created a
CapsuleClicker.csand aCapsuleClicker.assetbeside it (you may see two different icons instead of extensions). -
Move both the new
CapsuleClicker.csandCapsuleClicker.assetinto yourPackages/Awesome VR Game/Runtimedirectory. -
Open the script. The default script looks like:
CapsuleClicker.cs using UdonSharp;using UnityEngine;using VRC.SDKBase;using VRC.Udon;public class CapsuleClicker : UdonSharpBehaviour{void Start(){}}
Step 7: Implementing the script
Section titled “Step 7: Implementing the script”First, let’s add a namespace to the script, so it won’t conflict with other packages:
using UdonSharp;using UnityEngine;using VRC.SDKBase;
namespace Com.Example.AwesomeGame{    public class CapsuleClicker : UdonSharpBehaviour    {        void Start()        {
        }    }}
Notice that Com.Example.AwesomeGame is capitalized, while earlier our package name com.example.awesomegame is all lowercase. Unity requires package names to be lowercase, while C# style usually preferse capitalized namespaces. While it doesn’t matter too much otherwise, it’s nice to keep them consistent.
Then we’ll add a reference to the MugiGame behavior itself:
using UdonSharp;using UnityEngine;using VRC.SDKBase;using Hiinaspace.Mugi;
namespace Com.Example.AwesomeGame{    public class CapsuleClicker : UdonSharpBehaviour    {        public MugiGame mugiGame;
        void Start()        {
        }    }}
Then finally we’ll implement the Interact method, which gets called when you click on a thing in Udon:
using UdonSharp;using UnityEngine;using VRC.SDKBase;using Hiinaspace.Mugi;
namespace Com.Example.AwesomeGame{    public class CapsuleClicker : UdonSharpBehaviour    {        public MugiGame mugiGame;
        void Start()        {
        }
        public override void Interact()        {            VRCPlayerApi localPlayer = Networking.LocalPlayer;            if (mugiGame.gameState == MugiGame.STATE_RUNNING &&                mugiGame.IsPlayerInGame(localPlayer))            {                mugiGame.IncrementScore(localPlayer.playerId, 1);            }        }    }}
Now, when you click the capsule and you’re in the game, your score goes up. Don’t worry too much about the details for now.
While we’re here, we’re also going to add some debug logging:
using UdonSharp;using UnityEngine;using VRC.SDKBase;using Hiinaspace.Mugi;
namespace Com.Example.AwesomeGame{    public class CapsuleClicker : UdonSharpBehaviour    {        public MugiGame mugiGame;
        void Start()        {
        }
        public override void Interact()        {            Debug.Log("Capsule Clicked!");            VRCPlayerApi localPlayer = Networking.LocalPlayer;            if (mugiGame.gameState == MugiGame.STATE_RUNNING &&                mugiGame.IsPlayerInGame(localPlayer))            {                Debug.Log("Incrementing Score!");                mugiGame.IncrementScore(localPlayer.playerId, 1);            }        }    }}
Debug logging is good for you.
Step 8: Attach the Script and Reference
Section titled “Step 8: Attach the Script and Reference”- Select the “ScoreButton” capsule in the prefab hierarchy
- Click “Add
Component” and add your
CapsuleClickerscript - In the script component,
drag the root
MyAwesomeGameobject into the “Mugi Game” field.
Step 9: Configure Game Settings
Section titled “Step 9: Configure Game Settings”- Select the root
MyAwesomeGameobject in the prefab hierarchy - In the
MugiGamecomponent, configure:- Game Time Limit: 30 seconds (default 300)
- Min Players: 1 (default 2)
- Save the prefab.
We change these so when we’re testing, we don’t have to figure out multiplayer or wait 5 minutes for the game to end.
Step 10: Add your prefab to the Test Scene
Section titled “Step 10: Add your prefab to the Test Scene”- Navigate to
Packages/My Awesome Game/Samples2. Open theGameTestWorld.unityscene. 3. Navigate to thePackages/My Awesome Game/Runtimein the browser. 4. Drag yourMyAwesomeGameprefab into the scene.
You should see the scoreboard and your capsule visible now. Move it to (0,0,0) if it’s not.
Step 11: Test Your Game in Play Mode
Section titled “Step 11: Test Your Game in Play Mode”- Enter Play Mode in Unity. 2. In the Game window, dismiss the Client Sim UI.
- Observe your capsule and the UI provided by Mugi. 4. Join the game using the lobby UI. 5. Start the game using the lobby UI. 6. Click the capsule to increment your score 7. Look in the Console, and see the log messages that say “Capsule Clicked” and “Score Incremented”. 8. Once the game ends, see your final score on the scoreboard. 9. Exit Play Mode.
Step 12: Submit Your Game
Section titled “Step 12: Submit Your Game”- Open your package’s
package.jsonfile in a text editor. - Change the
entryPointfield to refer to your root prefab:package.json {...,"prefabEntryPoint": "Runtime/MyAwesomeGame.prefab"} - Open the VRG Game Jam Submission Helper from menu at the top of the Unity window:
vrg Game Jam 2025 > Submission Helper - The Helper window should automatically detect your package.
- Click “Refresh Validation” to check for issues. There may be some. You can ignore those for now (WIP)
- Accept the submission agreement.
- Click “Submit to Server”.
Step 13: Upload and Test in VRChat (Optional)
Section titled “Step 13: Upload and Test in VRChat (Optional)”- Open the VRChat SDK window from VRChat SDK -> Show Control Panel. 2. Name the world “Awesome game test” 3. Click “Capture in Scene” to make a thumbnail image. 4. Click the “Build & Publish” button. 5. Test the world with your friends (and/or alt accounts)
Reflection
Section titled “Reflection”You now have a working game submitted to the jam, and a demo world!
Next Steps
Section titled “Next Steps”Check out the Mugi docs to see what else you can do with the framework. Also check out the Resources for more useful tips when making your real game.
Help! it didn’t work!
Section titled “Help! it didn’t work!”If you got stuck somewhere or a step doesn’t make sense, post about it in the thread so we can try to fix both your problem and the tutorial.
Unity, Udon, and really gamedev in general is unfortunately pretty haunted. While it’s a total cope, sometimes deleting the entire project and trying the same steps again will fix things.